
In this WordPress tutorial, you’ll learn how to add a border around text in WordPress. And you can do it simply with the help of CSS. This is a very simple technique that can give your website a better and more professional look. Also, you can attract the attention of your readers by using a contrasting color for your text frame.
Contents
Why you should not install a plugin to add borders around text in WordPress
Your first thought would be to install a plugin that will do the job for you. However, if you install too many plugins, you expose your website to security risks. Therefore, it is better not to install a plugin for such a small task.
Another disadvantage of too many plugins is the loading time of your website. Many plugins make your WordPress website slower, and nobody wants that.
Now that we know why it’s a good idea not to use a plugin, let’s learn how to solve the problem ourselves with some simple CSS code
How to add a border around your text without a plugin
As already written, this task is relatively easy to accomplish. We don’t need a plugin for this. Just two small changes to your text and CSS.
Don’t worry, you can do this super easy even as a beginner.
Step 1: Give your text its own CSS class
To create a border around text in WordPress without plugins, we need the help of two things built into HTML and CSS: IDs and classes. An ID is an identifier for a specific element, while a class is an identifier for multiple elements that have the same properties (for example, a color).
In other words: We give the element you want to change a unique name. With this name, you can change the style of the element with simple CSS code.
Normally you would need custom code for this, but luckily the WordPress Gutenberg editor has a field built-in that allows us to give each element or group on our page its own class (name).
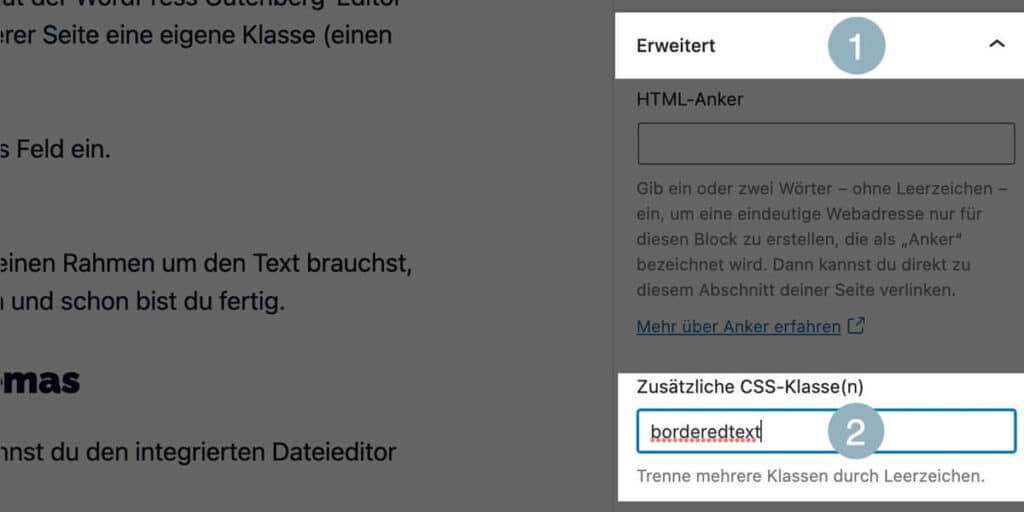
Select the text block you want to change and scroll down the sidebar on the right. There you will find the “Advanced” section, which you have to expand.
In the field “additional CSS class(es)” you now enter “borderedtext”. Of course, you can use any other name for your CSS class. Then you just have to consider it in the rest of the tutorial below.
Tip:
Choose a name that you can easily remember. If you need a frame around the text in the future, you can simply give the desired element this class name and you’re done.
Step 2: Edit the CSS file of your theme
In step 2 we need to edit the CSS file of your theme. For this, you can use the built-in file editor of WordPress.
Open your WordPress dashboard and click Appearance > Editor.
Click on your theme’s CSS file (style.css) and scroll to the bottom of the file. This is the right place to add our CSS code.
When you add the following code, all the text in the borderedtext class will have a thin black border:
.borderedtext {
   border-style: solid;
   border-width: thin;
   border-color: #000000;
   padding: 15px 15px 15px 15px;
}
So that the text does not stick directly to the frame, I have added padding specifications. Padding stands for inside spacing, so in this case, it controls the distance between text and border.
To change the thickness of the border, we can simply adjust the value of the border. Instead of the “thin” attribute, you can also use pixel values (e.g. “border-width: 20px;”). You can learn more about how to customize your frames here.
That’s it! You have now added frames around text in WordPress without using a plugin!
Bonus Idea:
On WPFellows, we mark important text or annotations with a red or blue border. Exactly like this:
This is an important text with very important notes.
Using the technique described above, you can easily create these boxes yourself.
Just add a background color, some padding, and a border-radius (for rounded corners) to your CSS, like this:
How to add a border around elements without editing your CSS file
I don’t prefer this way, but if you don’t want to edit your CSS file, there is another way.
With the Gutenberg editor, we can edit blocks in HTML. To do this, click on the text block around which you want to create a frame, and then click on the three items of the quick menu.
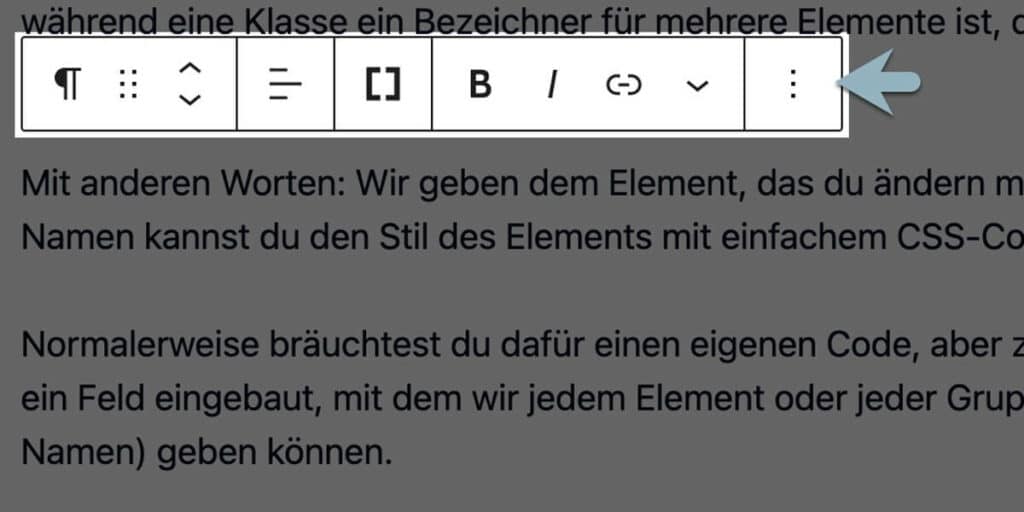
Now select “Edit as HTML” and your block will become editable. In this mode, we can write our CSS directly (inline) into our block.
Edit your text to get a frame around it.
<p style="border: 1px solid #000; padding: 15px 15px 15px 15px;">This is your text.</p>The big disadvantage of this method:
You change only this single block of text. Whenever you need another outlined text on your website, you need to repeat exactly the same steps.