
In this tutorial, I will show you how to install WordPress in a subdirectory. This is useful for anyone who wants to keep their website separate from the main domain. Especially if you want to create websites with completely different topics, installing WordPress in a subdirectory is the way to go.
Not only will I explain how to install WordPress, but I’ll also give you some helpful tips that will help you avoid the biggest mistakes beginners make.
Contents
What to consider if you want to install WordPress in a subdirectory
Setting up WordPress in a subdirectory of your main domain is a bit more confusing than most people assume, mainly because it’s so easy to set up WordPress “normally”. By the way, an alternative here would be our “Install WordPress on a subdomain” guide.
Luckily, though, you can simplify the process considerably by focusing on a few key details.
First, you should know that there is a difference between setting up WordPress in a subdirectory and a subdomain.
When you set up a subdirectory, you get the same “link juice” and search engine optimization (SEO) benefits that you would if you set up WordPress on your main domain the traditional way.
However, setting up a subdirectory can mess up your search engine optimization – and more – and usually causes more headaches and hassles than it’s worth.
Make sure that the very first thing you do (even before downloading WordPress itself) is set up your new subdirectory properly on your domain and hosting package.
I’ll take you through this process in detail in a moment. Don’t worry about it!
That being said, you should familiarize yourself with the traditional WordPress installation process before you get started.
Installing in a subdirectory isn’t much different, and there are plenty of guides – including video tutorials on YouTube – to walk you through the process from start to finish if you’re a little nervous.
Now that we’ve got that out of the way, let’s take a little closer look at setting up WordPress in a subdirectory.
These steps will guide you through the installation of WordPress in a subfolder
1. Create a subdirectory under the root domain
The first piece of the puzzle you need to solve is perhaps the most important: you need to create a subdirectory under your main domain name (also called root domain).
The easiest way is to connect directly to your hosting account via an FTP client like FileZilla (totally free, by the way) or via your cPanel using the file management tools there.
After you connect to your hosting package’s file management, you’ll have to navigate to the topmost area of your website. This is the “root folder”, the folder where all the other files of the website are located.
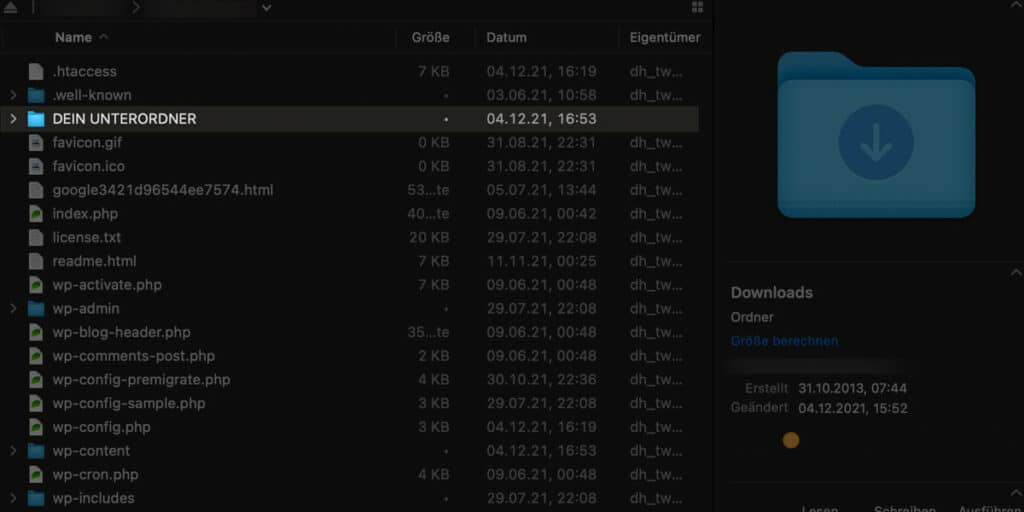
Just right-click on this folder, select the CREATE DIRECTORY option from the menu offered and give your subdirectory a new name.
Keep in mind that the new name you give your subdirectory will be part of your WordPress blog’s new web address.
For example, let’s say you name your new directory “Fantasy-Football” – and that’s the folder where you’ll (eventually) install your new WordPress blog software.
To access this new blog, type “https://yourdomain.com/fantasy-football/” in your browser’s address bar.
Pay attention to the name of the folder you give to your directory, that’s all.
This will be the address for your new website!
2. Download WordPress
Next, you need to take care of downloading the WordPress files for your blog directly from WordPress.
Don’t mess around with third-party installation packages, even if they promise you all sorts of themes, all sorts of add-ons, and all sorts of extras.
This will result in a messy WordPress installation at best, and all sorts of unwanted – and potentially dangerous – files on your web host at worst.
Go to WordPress.org and click on the big blue button in the top right corner. This will get you the latest package directly from the developers of this great open source platform.

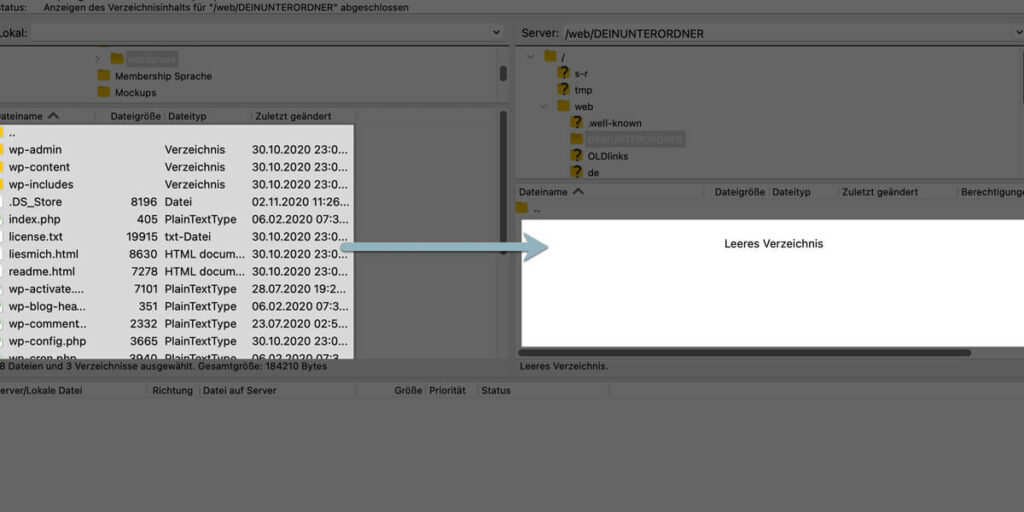
3. Upload WordPress files
Now you need to load the freshly downloaded WordPress files into your WordPress subdirectory without accidentally pushing them directly into your root directory. This is especially true if you have already uploaded files for your website.
Connect to your FTP client or to the file management tools in your cPanel that you also used to create the subdirectory.
Navigate to the upload options in these tools (sometimes found under the LOCAL FILES subheading) and select the WordPress package you want to install in your subdirectory.
Select the subfolder you have already created and make sure it is the destination folder for this file upload, then start the upload.
4. Create a new database
At this point, some people get stuck setting up WordPress on a new subdomain, but it’s really easy if you follow these instructions.
You need to create a database for your WordPress installation, otherwise you won’t be able to use the dynamic features you want to achieve with WordPress.
Go to the cPanel of your hosting package, click on the MySQL Databases section and then on the CREATE DATABASE option.
You can give your new database a name (a name that resembles your subdirectory is never a bad idea) and then have the option to create new users with new permissions.
Create a user account and password for yourself and this user for your new database, and you’re ready to go!
5. Edit the wp-config.php file
Go back into your FTP client or your file manager in cPanel for a moment so you can edit your WP-config.php file.
This file will be filled with various lines of code, but you’re mainly looking for a handful of custom settings.
Search for:
define('DB_NAME', 'database_name_here');
define('DB_USER', 'username_here');
define('DB_PASSWORD', 'password_here');
In the file (near the first lines), replace the placeholder text for your new database name, your new database user name, and your new database user password.
Save the file, make sure it’s uploaded to the same directory (replacing the existing file), and you’re ready to start the actual installation.
6. Install WordPress
The easiest way to go through the WordPress installation process in your subdirectory is to navigate to the new subdirectory address after reconfiguring your wp-config.php files.
https://www.yourdomain.com/yoursubfolder/Once you access this address in your browser bar, you will be redirected directly to the WordPress installation wizard.
Choose the language you want to use for the installation (English is selected by default), go through the on-screen instructions and after about 15 or 20 seconds you will have the option to start the installer yourself.
This process usually takes a few more seconds to a few minutes, and after 5 to 10 minutes your new WordPress installation is up and running in a specific subdirectory.
Now you’re ready to go!
Access via the main domain
There are cases when you don’t want your visitors to see that WordPress is installed in a subdirectory.
Maybe because there is an old installation in your root directory.
To do this, you just need to change the path settings in your new WordPress site. From
https://www.yourdomain.com/yoursubfolder/to
https://www.yourdomain.com/Additionally, you need to download both your .htaccess and your index.php and move them to your root directory.
I’ll explain exactly how this works in a separate tutorial.
Which is better for SEO? A subdomain or a subdirectory?
When it comes to search engine optimization (an important piece of the puzzle when it comes to online success these days, especially for small businesses in competitive niches), you need to make sure you’re doing everything you can to give yourself a boost.
That’s why it’s so important to install your new WordPress blog in a subdirectory of your main domain, rather than creating a subdomain.
Because all major search engines (first and foremost Google, of course) treat subdomains differently than subdirectories – and they even treat them differently than root domains!
However, subdirectories are not treated so strangely.
Instead, subdirectories are treated the same as a main domain name. This means that all the search engine optimization measures you have taken for your main domain will also be applied to your new blog and vice versa.
Search engine optimization is much better with a WordPress installation in a subdirectory than with a subdomain, that’s for sure.