
In this tutorial, I will explain how to install WordPress on a subdomain. You may have heard that you can install WordPress in a subdirectory, but not on a subdomain. A common misconception is that you can only run your website from the root domain. This is not true! In fact, you can use any available domain name as a base for hosting your website.
In this blog post, you will not only learn how to install WordPress. In addition, I’ll give you lots of useful tips to help you get started and avoid mistakes that can really cost you a lot of time and a lot of headaches later on.
If you get stuck at any point, just drop me your question below in the comments and we’ll be happy to help you out.
Install WordPress on a subdomain in 6 easy steps
Now it’s finally time to get down to business. I will guide you step by step through the installation.
Step 1 – Download WordPress
Later in the process, you will manually upload and install the files for WordPress to your site’s server. Of course, you’ll need to download the required files beforehand, so it is best to do it first to make sure you’ve got them handy when the time comes to install them.
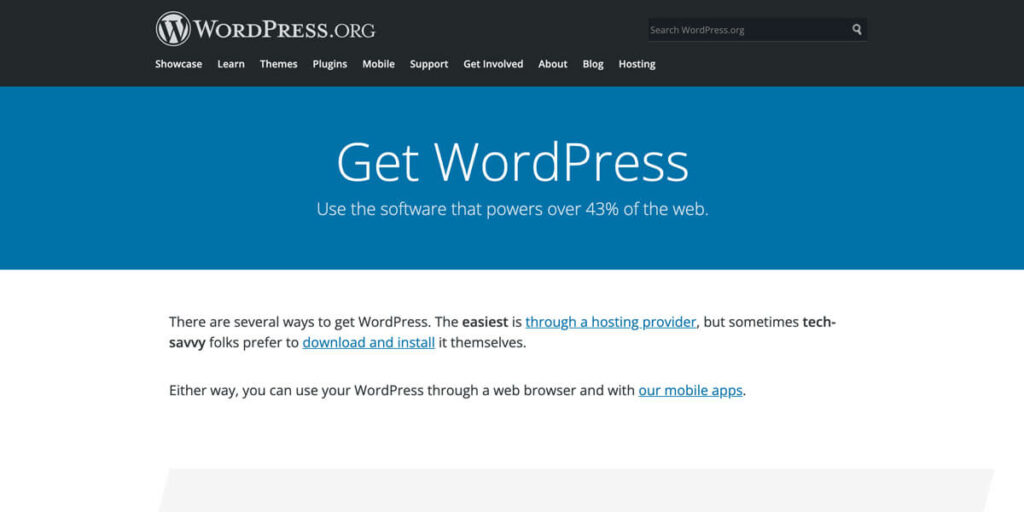
Head over to https://wordpress.org/download/ and hit the download button to download the latest version of the WordPress installation files.
Unzip/extract the files and save them to your local drive for now. You will upload the files to your subdomain in a later step.
Using Cpanel is the most straightforward option for uploading the files if you have access via your hosting provider.
For users who can’t use cPanel, an FTP client such as Filezilla is another option covered in this guide.
Step 2 – Create a Subdomain
The process of creating a subdomain can vary depending on which hosting service you are using. Nowadays, many WordPress users use hosting companies that allow for cPanel access.
Using Cpanel makes it simple to create a subdomain for your site.
When using Cpanel, log into your dashboard and scroll down to the “domains” section. From here, you will be able to find the “subdomains” option.
Once you’ve clicked on the subdomain button, you’ll be able to create a subdomain by filling out the relevant information fields.
After you’ve created the subdomain, you need to add a DNS record for your new subdomain. From your Cpanel dashboard, find the option for editing your site’s DNS files. It will be labeled “DNS management,” “DNS zone editor,” or something similar.
Once inside your DNS editor, you need to add an “A” record. In the host field, input the name of your new subdomain and fill out the rest of the required information. Add/save the record.
Be aware that it can sometimes take up to 24 hours for the new record to resolve.
If you don’t have Cpanel access, get in touch with your hosting provider and ask what steps they recommend for creating your subdomain.
Step 3 – Create a New Database
Once your new subdomain has been created, you need to create a new database on it to install the WordPress files.
Note: some hosting providers will automatically set up a new database on a subdomain. Be sure to check if a database already exists before using the following steps to create a new database manually.
Creating a New Database with cPanel
If you have access to it, using cPanel makes it quick and straightforward to create a new database for a WordPress installation.
Take the following steps inside the cPanel area for your subdomain:
- Beneath the “databases” section, select “MySQL Database Wizard.”
- Create a database and enter your desired name.
- Create a user name and a strong password for logging into your site’s admin area.
- Add your new username to the database and make sure you have selected the “all privileges” checkbox.
- Finally, complete the task. Make a note of the following values: hostname, username, databasename, and your chosen password. You will need those values later on for editing the WordPress configuration file.
Creating a New Database with phpMyAdmin
If you can’t access cPanel with your server, there is a good chance they will have phpMyAdmin installed. Add a new database for your subdomain using phpMyAdmin with these steps:
- Inside phpMyAdmin, navigate to the “databases” tab and fill in the field below the “create database” option. Enter the name for your new database.
In the “collation” dropdown menu, find the option for your coding and language. For coding, it is generally best to select “utf8_.”
If you can’t find your specific language, choose general, which will look like this: “utf8mb4_general_ci”.
Click “create.” - Return to the phpMyAdmin dashboard by clicking the logo in the top left of your page. Navigate to the “users” tab and select “add user” from beneath the users list.
Choose a username and strong password, then enter the information in the relevant text fields. Make a note of your username and password.
Make sure the options listed in “global privileges” are kept to the default setting and click “Go”. - Head back to the “users” tab and select “edit privileges” for the user you have just created.
Find the section labeled “Database-specific privileges” and select the database you created earlier.
You’ll now see the privileges your new user has inside your new database. Make sure everything is checked to give the user full privileges inside the database and click “Go.” - On the next page, you should see the hostname for your server at the top. It will be listed after the word “Server:”
Write down your hostname. Most of the time, it will be “localhost.”
Step 4 – Upload WordPress Files
The WordPress files you downloaded earlier need to be added to the root directory of your site’s domain.
The folder you need to locate in your site’s root directory is the public_html/subdomain folder. This is the folder where you’ll upload your WordPress files.
Again, the simplest way to upload the files is via cPanel if you have access to it. Inside the cPanel, you can navigate to “file manager” to view your site’s directory. You can then upload the unzipped WordPress folder directly into the correct location (public_html/subdomain).
For those who cannot use cPanel, you can use an FTP client like FileZilla to connect to your site’s directory and transfer the contents (not the folder itself) of the unzipped WordPress folder from your local drive to the correct location.
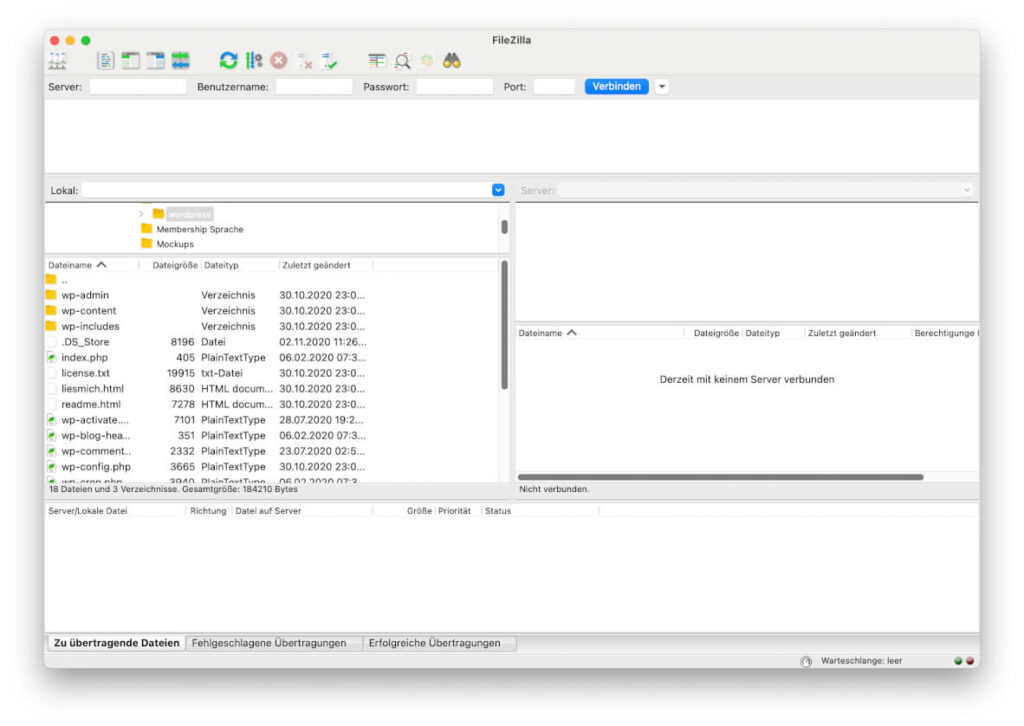
You will need to use the FTP login details from your main account (parent/original domain) to access the files in the subdomain.
Once connected via FTP, it is a simple case of locating the WordPress folder in your local drive on the left and dragging the contents into the “public_html/subdomain” folder in your site’s files, which are displayed on the right.
After uploading the files using FTP, you can delete the folder named “index.html” if it exists in your subdomain’s folder.
Step 5 – Edit your wp-config.php
Among the files you have just uploaded to your subdomain’s directory, you should find a file named “wp-config-sample.php.”
This wp-config-sample file needs to be edited with your subdomain’s database information. The WordPress installer looks for this file and will offer to create one if it isn’t found. However, you can enter the data and create the file manually to help the installation process run more smoothly.
Locate the wp-config-sample.php file and open it in a text editor (not a word processor).
Edit the values in the file to include the information specific to the database you created in step 3 of this guide. Here is the info you’ll need:
- Database name
- Database username
- Database password
- Database host
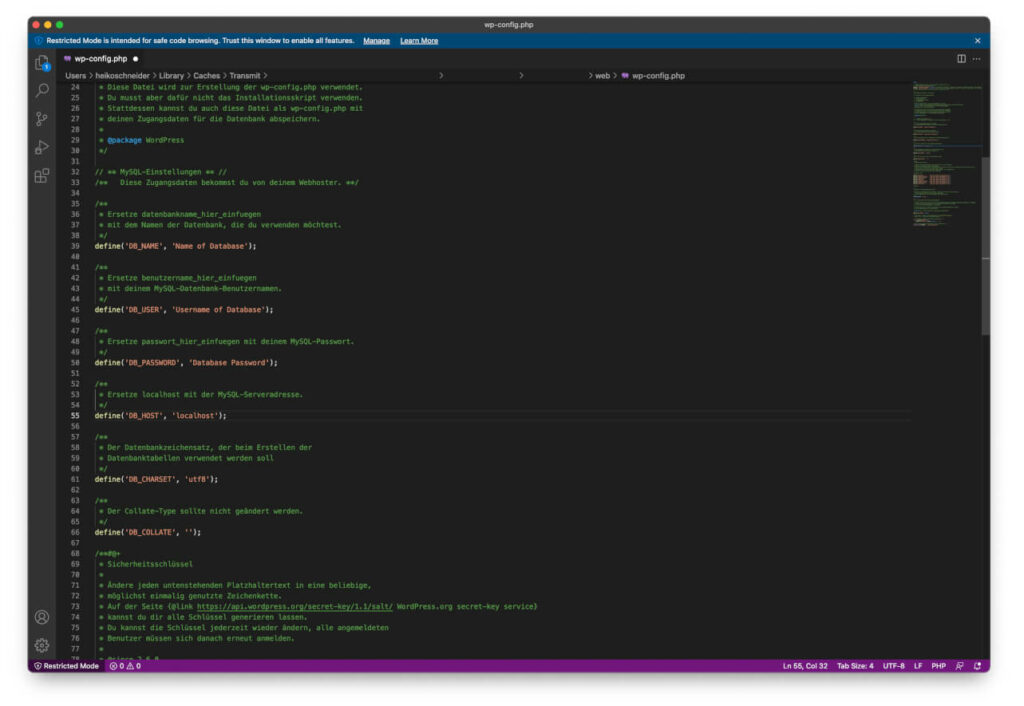
Here are the lines of code in the config file you need to edit:
define( 'DB_NAME', 'database_name_here' );
define( 'DB_USER', 'username_here' );
define( 'DB_PASSWORD', 'password_here' );
define( 'DB_HOST', 'localhost' );
You should have all of the required information due to going through step 3 in this guide and creating your database. Your hosting provider should be able to give you any information you do not have.
Important: rename the file wp-config.php and save it.
Step 6 – Install WordPress
The next step (and hopefully, final) is to run the WordPress install script. To run the script, open your web browser and visit the following URL:
mysubdomain.mysite.com/wp-admin/install.php
At this point, you can select your preferred language and let WordPress run the script.
In the steps so far, you haven’t created a WP-config.php file, so the installer will alert you of this and offer to create a file for you.
At this stage, you are going to need the details for the database you created earlier. Enter the information in the text fields and select “submit.”
WordPress will now prompt you to enter some details regarding your website.
Once the fields have been filled out, click “Install WordPress.”
If the installation was a success, you will now be greeted with the standard WordPress login page.
Subdomains vs. Subfolders: Which Is Better for SEO?
In terms of SEO, it can be difficult to provide a blanket statement that says one is better than the other. As with most things related to SEO, the best site structure can depend on several other factors.
All we can do is use the facts from Google and take them into account when deciding whether or not a website’s content should be placed inside a subfolder/subdirectory or on a subdomain.
Firstly, Google will rank the content on subfolders and subdomains the same way. The same overall ranking factors apply to both.
The most critical fact is that a subdomain will be treated as an independent entity. In other words, the content on a subdomain will be treated as an entirely separate site by Google.
This means your subdomain’s content will not benefit from any SEO boosts that the parent site could provide, such as site authority, backlinks, and internal link structures.
With this in mind, most sites would be better using subfolders for content than subdomains for SEO purposes, unless the content on each is unrelated or there are branding reasons for creating subdomains.
For example, some big media sites will host different content categories on subdomains so that search engines essentially view each subdomain as an authority site on that specific topic.